What's a good Tractor Post Hole Digger
So what makes a good tractor post hole digger? As the name suggests a tractor post hole digger is just that, a post hole digger. While all post hole diggers may dig holes there are a number of differences in them that can make a tractor post hole digger a great tool or nothing more than a pain in the a$$.
Hoop Positioning
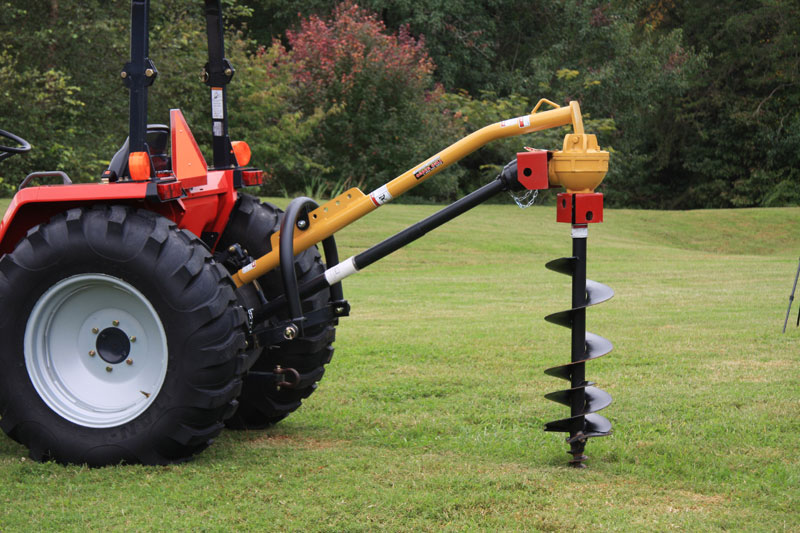
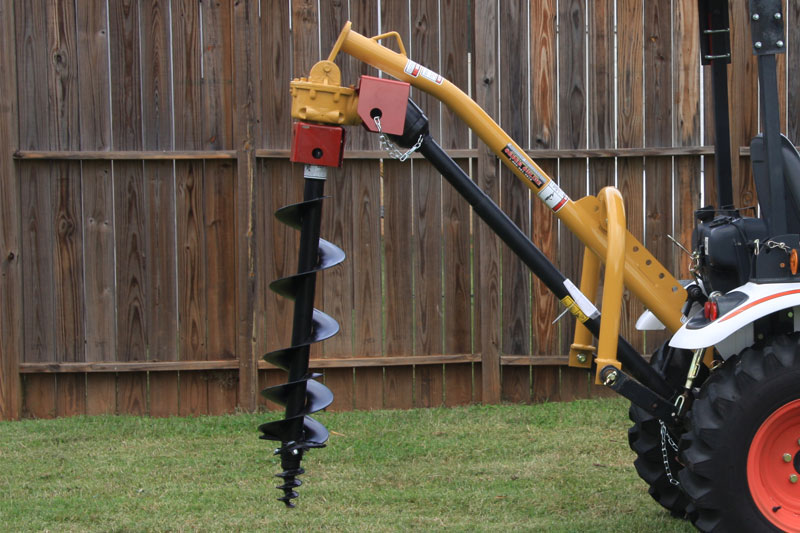
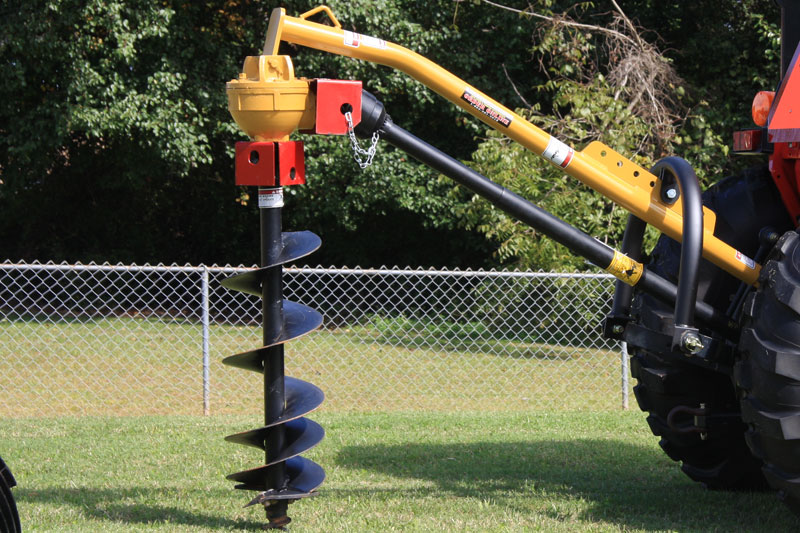
Let’s start off with the tubular hoop at the bottom of the boom near the tractor hitch. This hoop is used to help stabilize and lift the auger out of the ground. If you search the internet, you’ll find a lot of these hoops designed under the boom shaft however this can lead to problems down the road. It’s strongly recommended to find a digger where the tubular hoop is on the top of the boom which will ultimately give you more lift without the need to worry about bending the boom.
Adjustable Boom Stick
While it may not always be needed, having an adjustable boom stick can be very convenient and trust me if end up with a tractor post hole digger without an adjustable boom then you’ll surely be needing one.
Metal Gear Box Housing
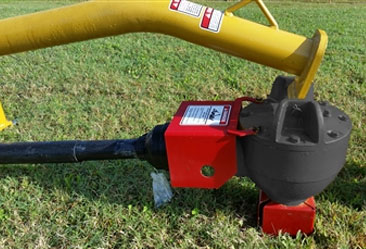
Another part that is normally skimped on is the gear box housing. A lot of manufactures use plastic case housings which over time crack and end up breaking off. This leaves the gear box open and subjected to weather, dust, dirt and foreign objects and shortens the life span of the gear box. Metal housing may rust on you but will last and protect the gear box for a greater period of time.
How to Select the Right Side Post Hole Digger

When selecting a tractor post hole digger, it’s very important to get the post hole digger for the job as every job can be different. There are a number of factors weight in on selecting the right post hole digger for the job. First thing you want to consider is how big a hole will you need so you can select an auger or at least have an idea of how big a digger you will need. The size of your tractor is also very important so that you can match the digger with the HP of your tractor and the auger with the digger. To ensure you get the right equipment it's always best to speak with a professional first before you make a purchase. This will save you a lot of time and money.
Below are a few Tractor Post Hole Diggers for Sale along with a video below them. Check them out to get a better understanding.
ETA Compact Tractor Post Hole Digger
Features:
ETA 6900 HD Tractor Post Hole Digge
Features:
EA 7500HD Category 2 Heavy Duty Tractor Post Hole Digger With Xtreme Duty Gearbox
Features:
Tractor Tiller Videos
Video Transcript:
Hi, I'm Ted from Everything Attachments, and we're here today with parts of the ETA, which is Everything Attachments, post hole digger. I just want to explain some of the things we've done for our own post hole digger and what improvements we've made and why there is a cost difference between an Everything Attachments post hole digger and a Leinbach post hole digger.
The Leinbach post hole diggers are great. We've sold a lot of them over the years. We've had trouble getting supply all the time of them, so just to keep our customers happy and to keep the supply line moving, we're producing our own augers in-house. And we've made a lot of improvements on them. They look similar, but we've made a lot of improvements and we just want to tell you what we've done and why these are costing more. It's not like I've just jacked up the price. You're truly getting what you pay for.
So we'll start with the gearboxes. This is an omni-gearbox, and yes, unfortunately, it is made in China. But most of the American manufacturers that have a good post hole driller line, and I'm going to try not to mention names because I would cover just about all of the manufacturers out there. But this box is on several different other companies, you know as a major manufacturer that also builds loaders and other components. And that box is rated up to a 24 inch auger. This is the smaller gearbox like would be on our Everything Attachments 6900 compact and the 6900. It's also an omni-gearbox and it's rated up to a 12 inch auger.
Now the difference between the Leinbach and the Everything Attachment drive shaft, Leinbach uses a class 2 shaft, which is fine up to 12 inches, and this is a class 4 shaft. It's good up to 24 inches. Now this shaft weighs 20 pounds more than a class 2 shaft. It's more expensive to ship, but you can't hardly tear it up if you wanted to, especially on the little digger. Now we're using a class 4 on the little digger just simply because when we buy in numbers and quantity we can buy one grade of a better shaft for the price of trying to manage two different grades for two different augers.
So we want to show you the difference in the auger, too. The Leinbach auger makes a good auger bit. They really do. They're a medium duty bit. Probably the biggest disadvantage is that when you wear out the tip where you're digging, you have to replace the whole head, which is about $30 or more, and then on these you would only have to replace just the tips. And actually is a better style of digging. And we're going to turn this around and show it to you.
OK, on the four inch bit, the problem with a four inch bit is it's only four inches and you got a real powerful gearbox here. So the four inch bit for right now is actually going to cost more than most of these bits. This is a Danuser bit. Because of the way it's built, it uses a small shaft, but to make it to where it has enough flighting on it to bring the dirt out, it has to be built like a brick house. It has a really thick tube, a really thick collar, has a good screw point on it, and it has the standard cutting edges on both sides. So it's hard to make a good four inch bit cheap. There's no real way to do it without it breaking and I've got quite a few broken cheap four inch bits around here. So we're just going to use the best bit I know of on the four inch.
On the six, nine and twelve and eighteen, these are bits that we got for Everything Attachments augers. They have a big nice long screw on the end, which is going to help start your hoe early. And then when you go to replace the tips, you only have to replace each point instead of the complete assembly. Now everything about these bits are just heavier, so they're more expensive for me to ship.
Now Everything Attachments augers will now come completely boxed in cardboard. We're putting a nice paint job on them. We're using heavier pipe, heavier tubing. They'll come encased in cardboard with that expanded foam to protect it, keep it from getting scratched from shipping, which is delivering. And we just want to give you a superior product at a great price. The price has gone up some, but you get what you pay for and I can guarantee you at Everything Attachments we're giving you all we can for the dollar. And we're keeping as much of this made in America as we can. All the booms and all were done and painted right here in this house. And if you'll give us a call or an email, we'll help size the right auger for your tractor and the right auger head and get everything right for you. Just give us a call or an email at Everything Attachments.
Video Transcript:
Hi, I'm Ted from everythingattachments.com and I'm going to try to show you how a Leinbach 3-Point Hitch PTO-Driven auger is going to come to you. We're going to ship this in three pieces for your convenience, ground. So you're going to have your gearbox assembly, your main boom and PTO shaft, your hoop or bale, and your auger. These are going to come banded together, shrink wrapped with saran wrap on them to hold them together, protect them as much as you can. Your PTO shaft is going to come banded to your hoop in two places, and then it's going to be shrink wrapped also. Your gearbox is going to come just like this with a shipping label on it. So you're going to have these three components to install to make a complete PTO auger system.
We're going to start by cutting. We're going to remove the top link on the tractor. And we're going to reuse this pin. This is the best way I know of to install this, especially the first time you get it when it's in pieces. We're going to remove the top link from the tractor. We're going to start in the middle hole here, there are three hole adjustments. We're going to start in the middle hole. So now your boom is attached. These are inch and 1/8 size bolts. You're going to need to loosen this bolt and remove it. You're going to set it across your boom, install it onto your tractor draw bar arms. We want this hoop to be as level as we can to get the most lift. We're halfway up with our draw bar arms, we're going to go with this hole right here. Then you'll need to tighten this with an inch and 1/8 or two big adjustable wrenches.
Now that we've got our boom on the tractor, our hoop installed, we're going to install this heavy gearbox. We're going to remove the carter pin, slide the pin to the edge, slip it under your boom, slide in your main pin, return your carter pin to the hole. You're going to need to bend that with your pair of pliers. Now that we've got the bale on the tractor, the hoop, the boom, the gearbox, we're going to install the PTO shaft. We've already got the screws unloosened here on the cover, and we're going to unloosen the cover just to show you some of the important safety devices and things you're going to need to know installing this PTO shaft. The reason this is cut right here is there's a set screw that's going to be holding inside of this groove, so if the shear bolt shears the PTO shaft cannot come off the gearbox and cause damage. This bolt is designed specifically... if your auger hits a rock or anything hard in the ground, instead of tearing up your tractor, your drive shaft, or your auger, this bolt that goes through your PTO shaft is going to shear and then your set screw is going to hold into this groove to keep the shaft from being able to pull off.
So we're going to remove the bolt out of the end of the PTO shaft. This is a shear bolt so if it ever quits working, your shaft is still turning, this is the bolt you will need to replace. This is the set screw that is used with an 1/8 inch Allen wrench which is going to be screwed down into this groove on the shaft. So we're putting our bolt through, put our nut on. That could be tightened with a 9/16 wrench or an adjustable. Now we're going to take our safety that keeps the shaft from coming off, we're going to run this set screw in. This is a 1/8 Allen wrench. We're going to go until it gets tight, we're going to back it up just a little bit so it can turn, and then we're going to lock the screw down, the nut around it so it can't turn. Tighten that, then we're going to install the PTO shaft onto the tractor.
We're going to disconnect the two chains holding the shaft together. You have a pin right here. This has to be pushed in to allow it to go into this groove which is on the PTO shaft. So the best thing to do is hold your pin all the way in, go in plenty far enough, release the pin, and pull back until you hear it click and then you'll know it can't go on or off any further. Now on the PTO shaft, these chains are designed to keep the cover from turning in the event you were... you shouldn't be near this in any way, shape, or form, but in the event that something could get wound up around this shaft these are kept on here for protection to keep them from turning. You're going to have one on your end of the shaft where the gearbox is and one on the tractor end.
Now the shaft on the outside collar can't turn regardless of the shaft turning on the inside. Now that the rest of the auger is assembled we're going to put our bid on. We're going to remove the two bolts out of our auger which will take a 3/4 inch wrench or an adjustable. Line your holes up with your gearbox best you can before you put it on. Okay, and you're pretty much ready to go drill a hole. ...our final shields, and then you're going to be ready to drill holes. The gearbox does come with oil in it. We ship them complete with oil.
I'm going to show you where to check it and where to fill it, just in case so you can check it. It always says check before running. There's a pipe plug here. That is where you're going to fill it from and there's a pipe plug here and that's your check level. So basically you remove both plugs and fill it until it runs out the side. The gearbox will come with oil but it's still a good idea to check it.
If you are interested in buying a Tractor Post Hole Digger check out this great online selection of Tractor Post Hold Diggers over at Everything Attachments